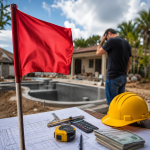
You don’t think about your pool surface every day. Then one morning, something feels off. The finish looks dull. Your feet catch on a few rough spots. Stains don’t brush out like they used to.
That’s usually how pool resurfacing problems show up. Quiet at first. Then harder to ignore.
In Florida, it happens faster than most expect. Strong UV exposure, constant water movement, and shifting weather conditions all wear down the surface layer over time. Add in harsh chemicals and daily pool care, and even a well-built swimming pool starts to show its age.
The good news is this. Most issues follow a pattern. Once you know what to look for, you can fix the problem early and avoid bigger repairs later.
What Are the Most Common Pool Resurfacing Problems?
Most pool resurfacing problems show up in ways that seem small at first. But they usually point to deeper wear in the pool surface.
Here are the ones you’ll see most often:
Common signs | What it usually means |
Rough surface or rough textures | The surface layer is wearing down |
Rust stains or discoloration | Metal or mineral buildup in pool water |
Peeling or flaking | Weak bond between old surface and new layer |
Cracks or rough spots spreading | Possible structural issues or shell damage |
Algae growth in patches | Surface becoming porous |
A fiberglass pool might show fading in the gel coat or exposed fiberglass fibers. A plaster pool finish may develop rough textures or exposed aggregate. Even vinyl liners can wrinkle or weaken over time.
These are common signs your pool needs resurfacing. Ignoring them doesn’t keep the surface stable. It just gives the damage more time to spread.
Why These Pool Resurfacing Problems Happen in the First Place
Most pool resurfacing problems are not random. They build up over time, usually from a mix of environment and missed steps during earlier work.
Florida plays a big role. Strong sun exposure breaks down surface material. Heat speeds up chemical reactions in pool water. Then, sudden storms shift the water balance fast.
But the bigger issue is often what you don’t see.
Poor surface preparation is a common cause. If the existing surface is not cleaned, stripped, or prepped properly using methods like hydro blasting or acid washing, the new surface does not bond well. That leads to peeling or early failure.
Water chemistry matters too. Too many harsh chemicals or unbalanced levels can eat into plaster, marble, sand, or even pebble finishes.
Over time, small issues stack up. Without proper maintenance, even quality materials start to break down faster than expected.
The Hidden Mistake Most Homeowners Make Before Resurfacing
Here’s where many pool owners get it wrong.
They focus on the finish. Not the process.
It’s easy to compare resurfacing options. Standard plaster, pebble finishes, exposed pebble, and even glass beads. All of them can look great. But none of them will last if the base is not handled correctly.
The biggest mistake is skipping a full evaluation of the pool shell and existing surface.
Let’s say a homeowner chooses a new coat because the pool’s appearance looks worn. The surface gets covered. It looks clean and smooth for a while. Then cracks come back. Or the new layer starts to separate.
That usually means the original problem was deeper. Structural integrity, hidden moisture, or shell damage.
A good pool builder or contractor checks these first. Not last.
Another mistake is chasing the lowest price. Lower quotes often cut back on prep work, materials, or curing time. That’s where most pool resurfacing problems start.
The finish matters. But the steps before it matter more.
How Long Pool Resurfacing Takes (And Why Rushing It Causes Problems)
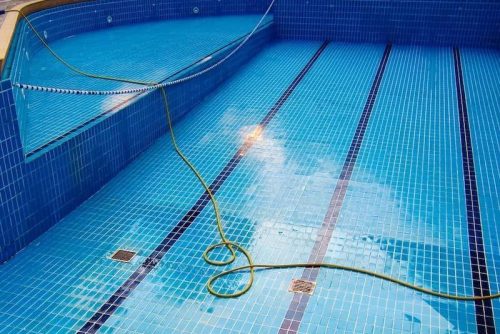
Resurfacing is not a one-day job. And when it gets rushed, pool resurfacing problems tend to show up sooner.
Most resurfacing projects take several days, depending on pool size, pool type, and the condition of the old surface. Each step involves something important.
First comes draining and inspection. Then surface preparation, which might include hydro blasting or grinding. After that, repairs are done before applying the resurfacing material.
Once the new layer is applied, the curing process begins. This part matters more than most people realize. A proper curing process helps the new surface harden evenly and bond correctly.
If this gets rushed, the result is often a weaker finish.
If you want a deeper breakdown of timing, this guide on how long pool resurfacing takes explains each step clearly.
Good work takes time. Cutting that time usually cuts quality too.
How to Avoid Pool Resurfacing Problems (Without Overpaying)
Avoiding pool resurfacing problems is not about spending more. It’s about knowing what actually matters.
Start with inspection. A proper check of the pool’s condition should come before any quote. That includes the pool shell, surface wear, and signs that your pool needs deeper repair.
Then look at the process, not just the price.
A reliable contractor should explain:
How the old surface will be removed
What repairs are needed before the new layer
Which surface material fits your pool and usage
How the curing process will be handled
Ask about materials, too. Quality materials like marble sand, pebble finishes, or exposed aggregate last longer when installed correctly.
And don’t skip pool care after the job. Balanced water chemistry and regular maintenance protect the finish long term.
If you want a full overview of what to expect, check this guide on pool resurfacing in Florida.
The goal is simple. Do it once. Do it right.
How Your Outdoor Setup Can Affect Pool Surface Lifespan
Your pool area does more than frame the look. It affects how long your pool surface lasts.
Direct sun exposure speeds up wear. UV exposure breaks down finishes over time, especially in open backyards. Shade structures or enclosures can slow that process.
Debris matters too. Leaves, dirt, and even dust settle into the water and affect water chemistry. That leads to staining or algae growth.
Even patio furniture placement plays a role. Chairs dragged along the pool deck can introduce debris or scratch nearby finishes.
Water movement also matters. Constant water movement from pumps and features can slowly wear certain areas faster than others.
Some homeowners overlook how enclosures help. They reduce debris, control exposure, and protect the surface.
This guide on the best pool enclosure for Florida weather breaks that down in a practical way.
Small setup changes can extend surface life more than expected.
When Pool Resurfacing Is the Right Fix (And When It’s Not)
Not every issue needs resurfacing. But many pool resurfacing problems are early signs that it’s time.
Resurfacing works best when the structure is still solid.
It’s the right move when you see:
Rough surface or rough spots
Stains that don’t respond to an acid wash
Fading or worn pool finish
Minor cracks in the surface layer
In these cases, resurfacing restores both function and the pool’s appearance.
But there are times when resurfacing is not enough.
If there are deeper structural issues, major repairs may come first. Things like shell damage, shifting soil, or long cracks in the pool shell need to be fixed before any new surface is applied.
Think of it like this. Resurfacing improves the surface. It doesn’t fix the foundation.
A proper inspection helps you decide the right path. It keeps you from spending on a new layer when the real problem sits underneath.
What a Proper Pool Resurfacing Process Should Look Like
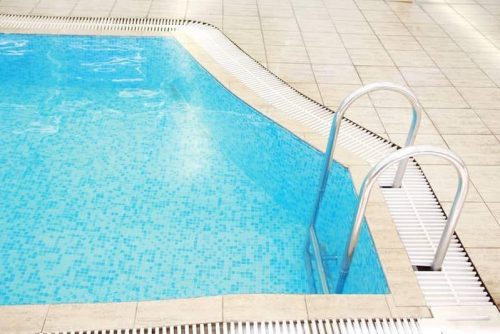
A solid pool resurfacing process follows a clear sequence. Skip a step, and problems show up later.
Here’s what a proper process looks like:
Inspection and prep
The pool is drained. The existing surface is checked for cracks, stains, and damage.Surface preparation
Old material is removed using hydro blasting or grinding. This step creates a clean base.Repairs
Any shell damage or weak areas are fixed before moving forward.Bond coat application
A bond coat helps the new surface attach properly to the old base.New surface installation
The chosen resurfacing material is applied evenly across the pool.Curing process
The surface is allowed to set and harden properly.Refill and balance
Water is added back, and water chemistry is balanced.
This process is what separates short-term fixes from long-lasting results.
What This Means for Your Pool
Most pool resurfacing problems are avoidable. That’s the part many homeowners don’t hear enough.
When the process is done right, resurfacing restores function, improves the look, and extends the life of your swimming pool. It gives you a smooth finish, cleaner water behavior, and a more visually appealing space.
When it’s rushed or skipped, the same issues come back. Sometimes faster.
If you’re noticing rough textures, stains, or changes in the surface, it’s worth taking a closer look now. Early action keeps things simple.
Creative Pool & Spa approaches every project with that in mind. Start with the right inspection. Follow the right process. Get a result that actually lasts.